* Add M6-A keymap * Update XD60 keymap * Update XD60 keymap readme * Update JJ40 and Let's Split keymaps * Add readme for M6-A * Fix typo, update JJ40 README * Update jj40 readme * Cleanup jj40 keymap * Revert Let's Split QWERTY layer to default before #2010 * Update numpad layers * Fix: Let's Split keymap getting stuck mods due to having keycodes assigned on the Raise layer * Keep ASCII art consistent with keymap * Staryu: initial port * Add personal keymap * Added and updated READMEs * Fix: default keymap for staryu * Rudimentary backlight support. * Enabled mousekeys for default keymap * use QMK_KEYBOARD_H and LAYOUT * Update readme.md for NIU mini: flash using avrdude * Fix missing linebreaks for Staryu README * Update readme.md * Update PS2AVRGB boards with new matrix.c * Update canoe matrix.c; untested * Fix canoe.c for building (needs matrix_scan_user and matrix_init_user) * Add personal Iris keymap * Update keymap * Update keymap * Update keymap, disable backlighting and underglow * Move PrintScreen button * Add README * Update personal keymaps * Add INS key * Limit USB max power consumption, change Fn to MENU * Remove Numpad layer (easy to accidentally toggle) * Fix backlighting for ps2avrgb * Update comments to refer to actual pin naming * Possible fix for xyverz ortho keymap: define RGBLED_NUM * Make led_set_user in backlight.c overridable * Add changes to address points raised in code review, untested (don't have build env right now) |
||
|---|---|---|
| .. | ||
| keymaps | ||
| tools | ||
| README.md | ||
| backlight.c | ||
| backlight_custom.h | ||
| breathing_custom.h | ||
| config.h | ||
| i2c.c | ||
| i2c.h | ||
| jj40.c | ||
| jj40.h | ||
| matrix.c | ||
| rules.mk | ||
| usbconfig.h | ||
README.md
jj40
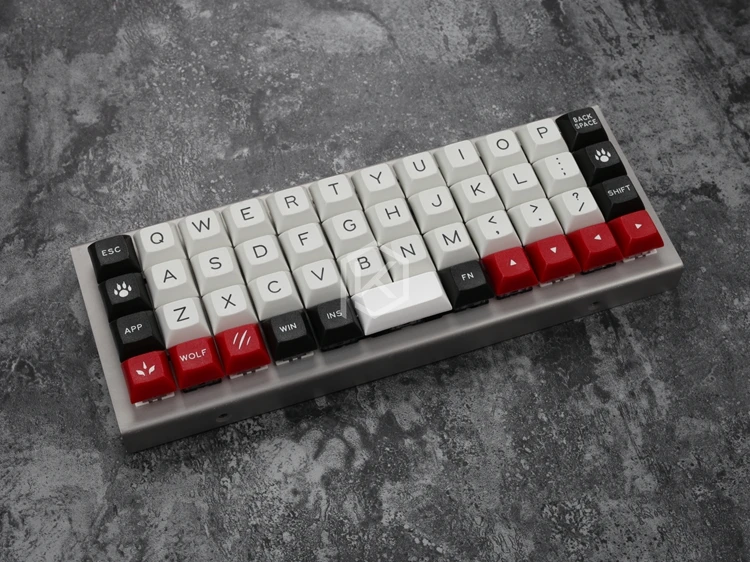
A compact 40% (12x4) ortholinear keyboard kit made and KPRepublic on AliExpress.
Keyboard Maintainer: QMK Community
Hardware Supported: Atmega32A
Hardware Availability: AliExpress
Make example for this keyboard (after setting up your build environment):
make jj40:default:program
See build environment setup then the make instructions for more information.
Note that this is a complete replacement for the firmware, so you won't be using Bootmapper Client to change any keyboard settings, since not all the USB report options are supported.
In addition you may need the AVR toolchain and bootloadHID (GitHub repo) for flashing:
For macOS:
$ brew cask install crosspack-avr
$ brew install --HEAD https://raw.githubusercontent.com/robertgzr/homebrew-tap/master/bootloadhid.rb
For Linux:
$ sudo apt install libusb-dev
$ wget https://www.obdev.at/downloads/vusb/bootloadHID.2012-12-08.tar.gz
$ tar -xzf bootloadHID.2012-12-08.tar.gz
$ cd bootloadHID.2012-12-08/commandline
$ make
$ sudo cp bootloadHID /usr/bin
In order to use the ./program script, which can reboot the board into
the bootloader, you'll need Python 2 with PyUSB installed:
$ pip install pyusb
If you prefer (or are having issues with a program flash), you can just build it (make jj40:<keymap-name> and flash the firmware (.hex file) directly with
bootloadHID if you boot the board while holding down Backspace (Top Right Key) to keep it
in the bootloader:
$ make jj40
$ bootloadHID -r jj40_default.hex
For Windows 10: Windows sometimes doesn't recognize the jj40. The easiest way of flashing a new layout is probably using HIDBootFlash.
- Go to Windows Device Manager and find the keyboard (plug it in while holding down
Backspace(Top Right Key)). It can be found under Human Interface Devices or under Keyboards. - Go to properties and the Details tab to find the hardware ID. You want the VID and the PID (code after the underscore). Plug them into HIDBootFlash and hit Find Device.
- Use
make jj40:<keymap-name>to generate the .hex file in the qmk basis folder. Select the .hex file in HIDBootFlash and press Flash Device.
Troubleshooting
- Try plugging the board in while pressing
Backspace(Top Right Key). This will force it to boot only the bootloader without loading the firmware. Once this is done, just reflash the board with the original firmware. - Sometimes USB hubs can act weird, so try connecting the board directly to your computer or plugging/unplugging the USB hub.
- If you get an error such as "Resource Unavailable" when attemting to flash
on Linux, you may want to compile and run
tools/usb_detach.c. Seetools/README.mdfor more info.
